Powered by Blogger.
Showing posts with label clay jewelry. Show all posts

{DIY} Clay Pineapple Ring

Tuesday, April 22, 2014

You guys know me and clay DIYs — they're just too fun to resist! Playing with the stuff makes me feel like a kid again (probably why I also love Shrinky Dinks so much), plus the possibilities are pretty much endless in terms of what you can whip up. So after months of pining for summer, I felt the urge to bring a little piece of that to my fingertips with a fun pineapple ring! And although there's still snow on the ground where I live (actually), you would never suspect it by looking at my hands.
Read on for full instructions!

SUPPLIES: FIMO CLAY | BOBBY PIN | GOLD SPRAY PAINT | RING BASE | GLUE

TIME: 1 HOUR | DIFFICULTY LEVEL: EASY

Take a piece of FIMO clay and roll it around to make it soft and malleable. Roll a larger chunk into an oval shape to form the pineapple base, then mold four smaller strips into stylized leaf shapes.

Combine all four pieces together, adding a thin layer of clay to hide the seams. Flatten the ridges as best you can with your fingertip, them use a bobby pin to smooth everything out.

Draw a thin line separating the pineapple base from the top, then draw intersecting lines across the base for decorative impact. Once you're happy with your design, carefully transfer the pineapple onto a baking sheet and pop it into the oven following package instructions for about half an hour.

Once fully cooled and hardened, spray paint the pineapple whatever colour you wish; I chose gold because it's my favourite finish, but you could use acrylic paint or even nail polish to get whatever look you want. Let the paint dry fully, then adhere your pineapple to a ring base using strong glue.

And that's it! Easy and adorable... now if only the weather would cooperate. xx

{DIY} Clay Pretzel Necklace

Tuesday, February 18, 2014

A golden pretzel necklace DIY made from clay
I must be going through some kind of clay phase lately, because try as I might, I just can't stop crafting with the stuff. It's just so fun and easy, and I love that I can make pretty much anything from the stuff — within reason. So while I was making a conversation heart ring a couple weeks ago, I had the idea to whip up a pretzel necklace with the leftover clay... You know, waste-not-want-not, or whatever. Read on for instructions!

A golden pretzel necklace DIY made from clay
Using soft FIMO clay, roll a small amount into a long, noodle-like piece. Cross the ends over one another to form a pretzel shape, gently pressing down the ends to join them together. I decided to rough up the surface of my pretzel to make it look like coarse salt, but this step is optional.

From there, bake your pendant in the oven following the package directions for about 30 minutes.


A golden pretzel necklace DIY made from clay
Once your now-hardened pretzel cools, spray paint it with gold paint. While that dries, gather up the rest of your supplies: Chain (16"-18"), jump rings, wire and pliers.

A golden pretzel necklace DIY made from clay
Take a pre-looped piece of wire and wrap it around the top of the pretzel on one end, leaving enough room to wrap the remaining wire around itself. Firmly wrap the wire and squeeze the end to secure it. Repeat on the other side.

A golden pretzel necklace DIY made from clay
Using jump rings, connect the pendant to the chain and BOOM — you're all done! Wear this bad boy alone or layered with a couple other necklaces for an effortlessly chic look... looking good, my friend.

I hope you guys enjoyed this fun little project, and as always, thanks for reading! xx

{DIY} Conversation Heart Ring

Thursday, February 6, 2014

 photo Valentines-Day-Conversation-Heart-Ring-DIYcopy_zps3473c6c6.jpg
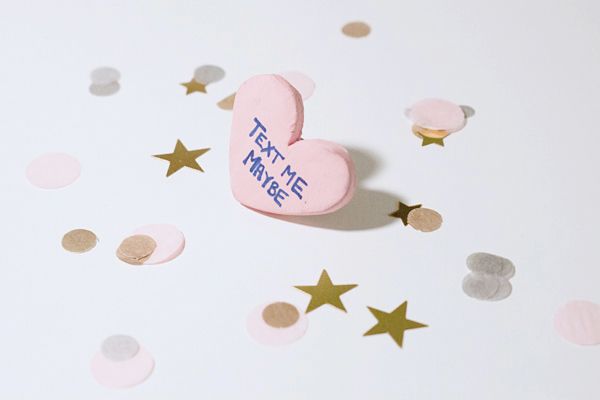
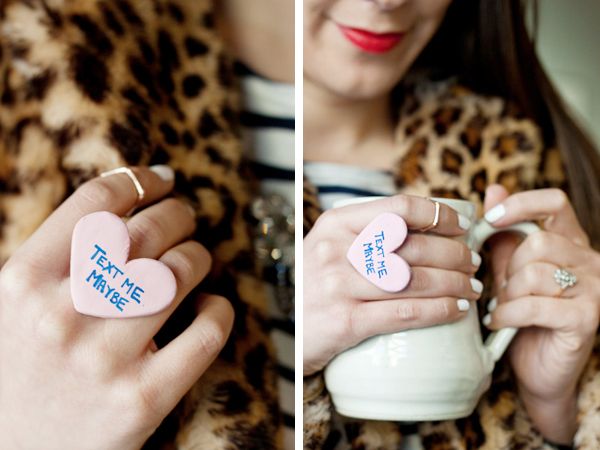
I'm a total sucker for conversation heart candy (but really, who isn't?), so I thought it would be fun to make a ring of my favourite Valentine's treat. It's fun, easy and a super cute way to embrace this time of the year, so if you want to be a cheeseball and join the fun, here's what you've got to do!


 photo ClayRingDIYStep1_zps0fe17b87.jpg
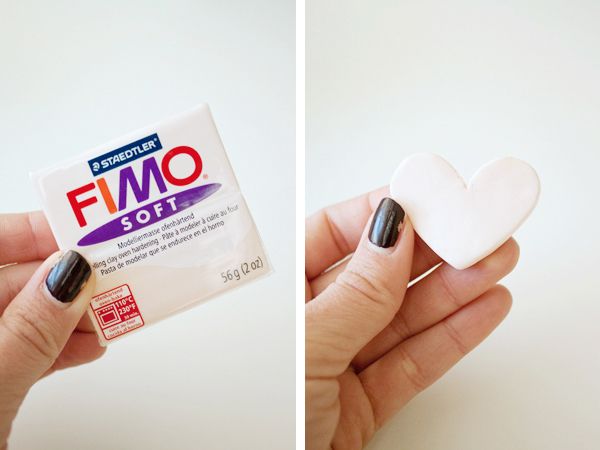
Using soft FIMO clay, warm a small piece between your hands for a few minutes to make it malleable. Roll out the clay and smooth any bumps or ridges from the surface. Using a knife, cut out a heart shape, working the edges so they're smooth and the heart is symmetrical.

When you're happy with your shape, pop that bad boy in the oven and bake it following the package instructions (mine took about 30 minutes to harden). Once that's done, allow the shape to cool fully.

 photo ClayConversationRingDIYStep2_zps778b3e03.jpg
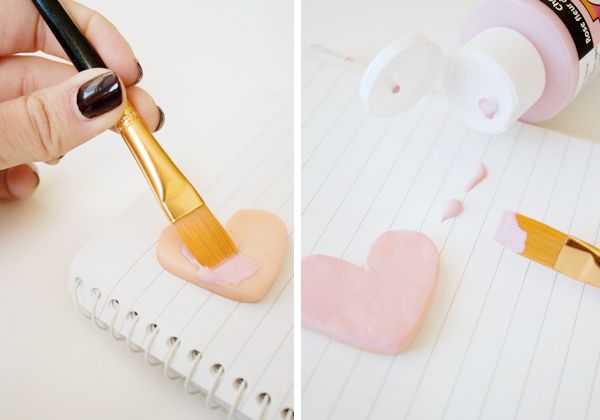
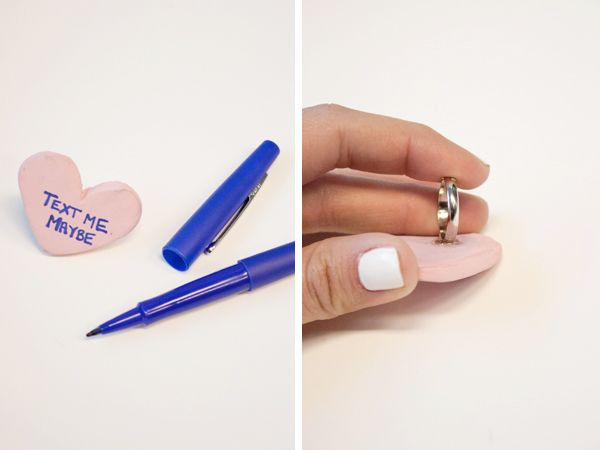
From there, paint the heart using an acrylic paint (you could even use nail polish!). I chose light pink because it reminds me most of the candy, but you can get as creative as you like with this one. Once dry, use a felt tipped pen to write your message. I had a hard time choosing between "Cute Tush," "Hollah At Your Girl" and this one, but "Text Me Maybe" won out in the end, hands down.

 photo ClayConversationRingDIYStep3_zpsd3d51f58.jpg
Let the ink dry for as long as possible to avoid smudging, then glue a ring to the back of the heart, pressing firmly for about 30 seconds to adhere... How easy is that? xx

 photo ConversationHeartRing_zps746a772e.jpg
Final photo by Sam Brooks

{DIY} Clay Geometric Necklace...

Tuesday, January 15, 2013

Photobucket

I was recently turned on to the idea of making jewelry from clay, and now that I've tried it a couple of times, I seriously can't stop. Naturally I wanted to share this DIY with you guys, because not only is it super easy and inexpensive, but it's fun to boot. Want to give it a try? Here's what you've got to do!

Photobucket

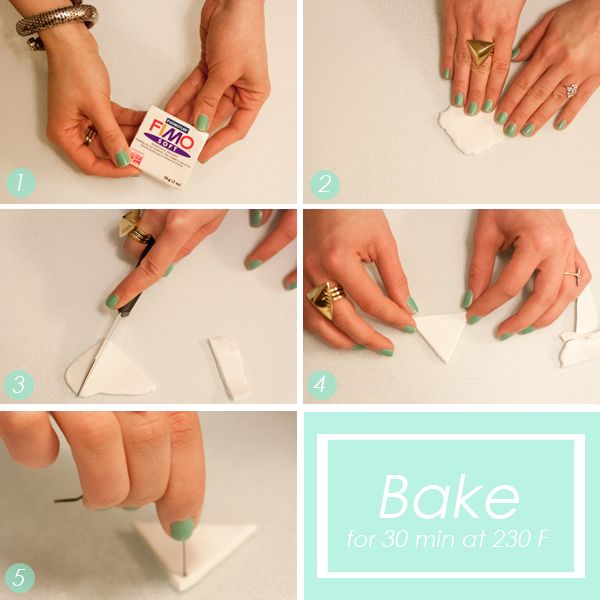
1. Pick up a pack of clay at your local craft store. I chose FIMO (about $4) but any kind will do.
2. Roll out the clay and smooth the surface as much as possible.
3. Using a knife, carefully cut your desired shape from the clay.
4. Work the edges of your shape to make it as smooth and symmetrical as possible.
5. Poke a whole through the top of your shape to later attach a jump ring.
6. Bake your new pendant at 230F for about 30 minutes. If your pendant is thicker, you'll have to adjust your bake time accordingly.

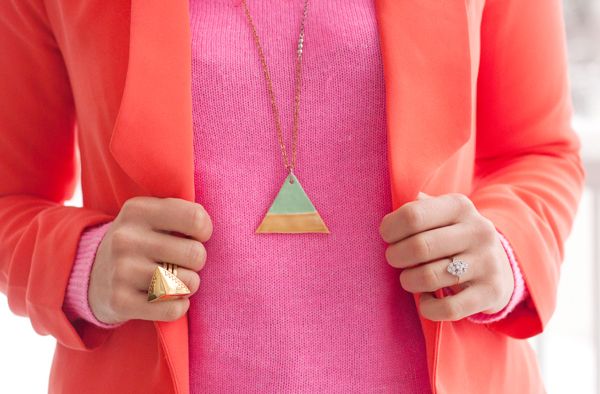
After the piece cools fully, paint it any way you please. I chose to use nail polish (like here and here) because I had the colours I wanted in that form, but use whatever medium you prefer. When you're done, simply add a jump ring and some chain, and you've got yourself a brand new necklace... Easy peasy.

Photobucket

Hope you guys like this DIY... If you decide to give it a try, let me know how it goes! xx