Powered by Blogger.
Showing posts with label crafts. Show all posts

two easy DIY's!

Monday, May 5, 2014

I've taken a bit of an unexpected blogging break... It's been hectic here with running my business and taking care of my daughter and all the times I've tried to sit down and blog, I just get pulled into something else as my husband and I are still working on getting our home decorated as well.  And to be honest, if I'm not working, I want to spend every moment with Layla.  She is at such a fun age where she is doing new things every day and I just love being with her.  But I am going to come back eventually, I have no idea when but hopefully sooner rather than later and I want to thank those of you who have stuck around and are still reading!  You guys are the best!

Instagram is the easiest way for me to do any kind of social media these days so would love to have you guys follow me over there (and please do let me know your username as well!  I would like to follow my readers/followers back but a lot of your accounts are private so don't want to intrude.)

I put together two fairly easy DIY's that I wanted to share.  Even a busy mom like myself has time for these!  The first is a mongram tray.  I've been wanting one for awhile but I haven't been able to find any that are reasonably priced and the ones that I did find were not quite my taste.  I was shopping at Target and (of course as you do at Target, you see random things and think "I need that!) which is how I came across these stickers.  I knew I had to do something with them so I brought them home and thought about what I could use them for and voila! A monogram tray popped in my head.  

The sticker brand is called "Thickers" and they are a nice quality sticker that sticks up a little bit but not too bad that you can't put stuff on top of it.  There are a ton of fonts and colors but I've been on a gold kick lately so of course had to get the gold ones.  The tray I got off Amazon, it is this exact tray and it also comes in a variety of sizes and colors so you could really customize your tray to exactly how you like it!  It looks great on our table and so easy to add a few items to decorate with.  I don't use it to carry food so not sure how it will hold up if you put a cup on it and water gets on the stickers but for decor, it is perfect and for being about $25 total to make the project, it's well worth it!

Sorry for the grainy photo here, I literally took this photo at 2am.  I had bought these polka dot vinyl decals about a month ago (mine are the 4" ones) and knew it was going to take some time to put them up so I kept on putting them off until one night after I put Layla to bed, I was determined to just tackle it all in one night!  The decals themselves are very easy to put on.  It's the measuring of the wall, the distance between your dots and trying to get them spaced just right is the hard part.  I absolutely love how it turned out though and my office is that much more fun with this wall!
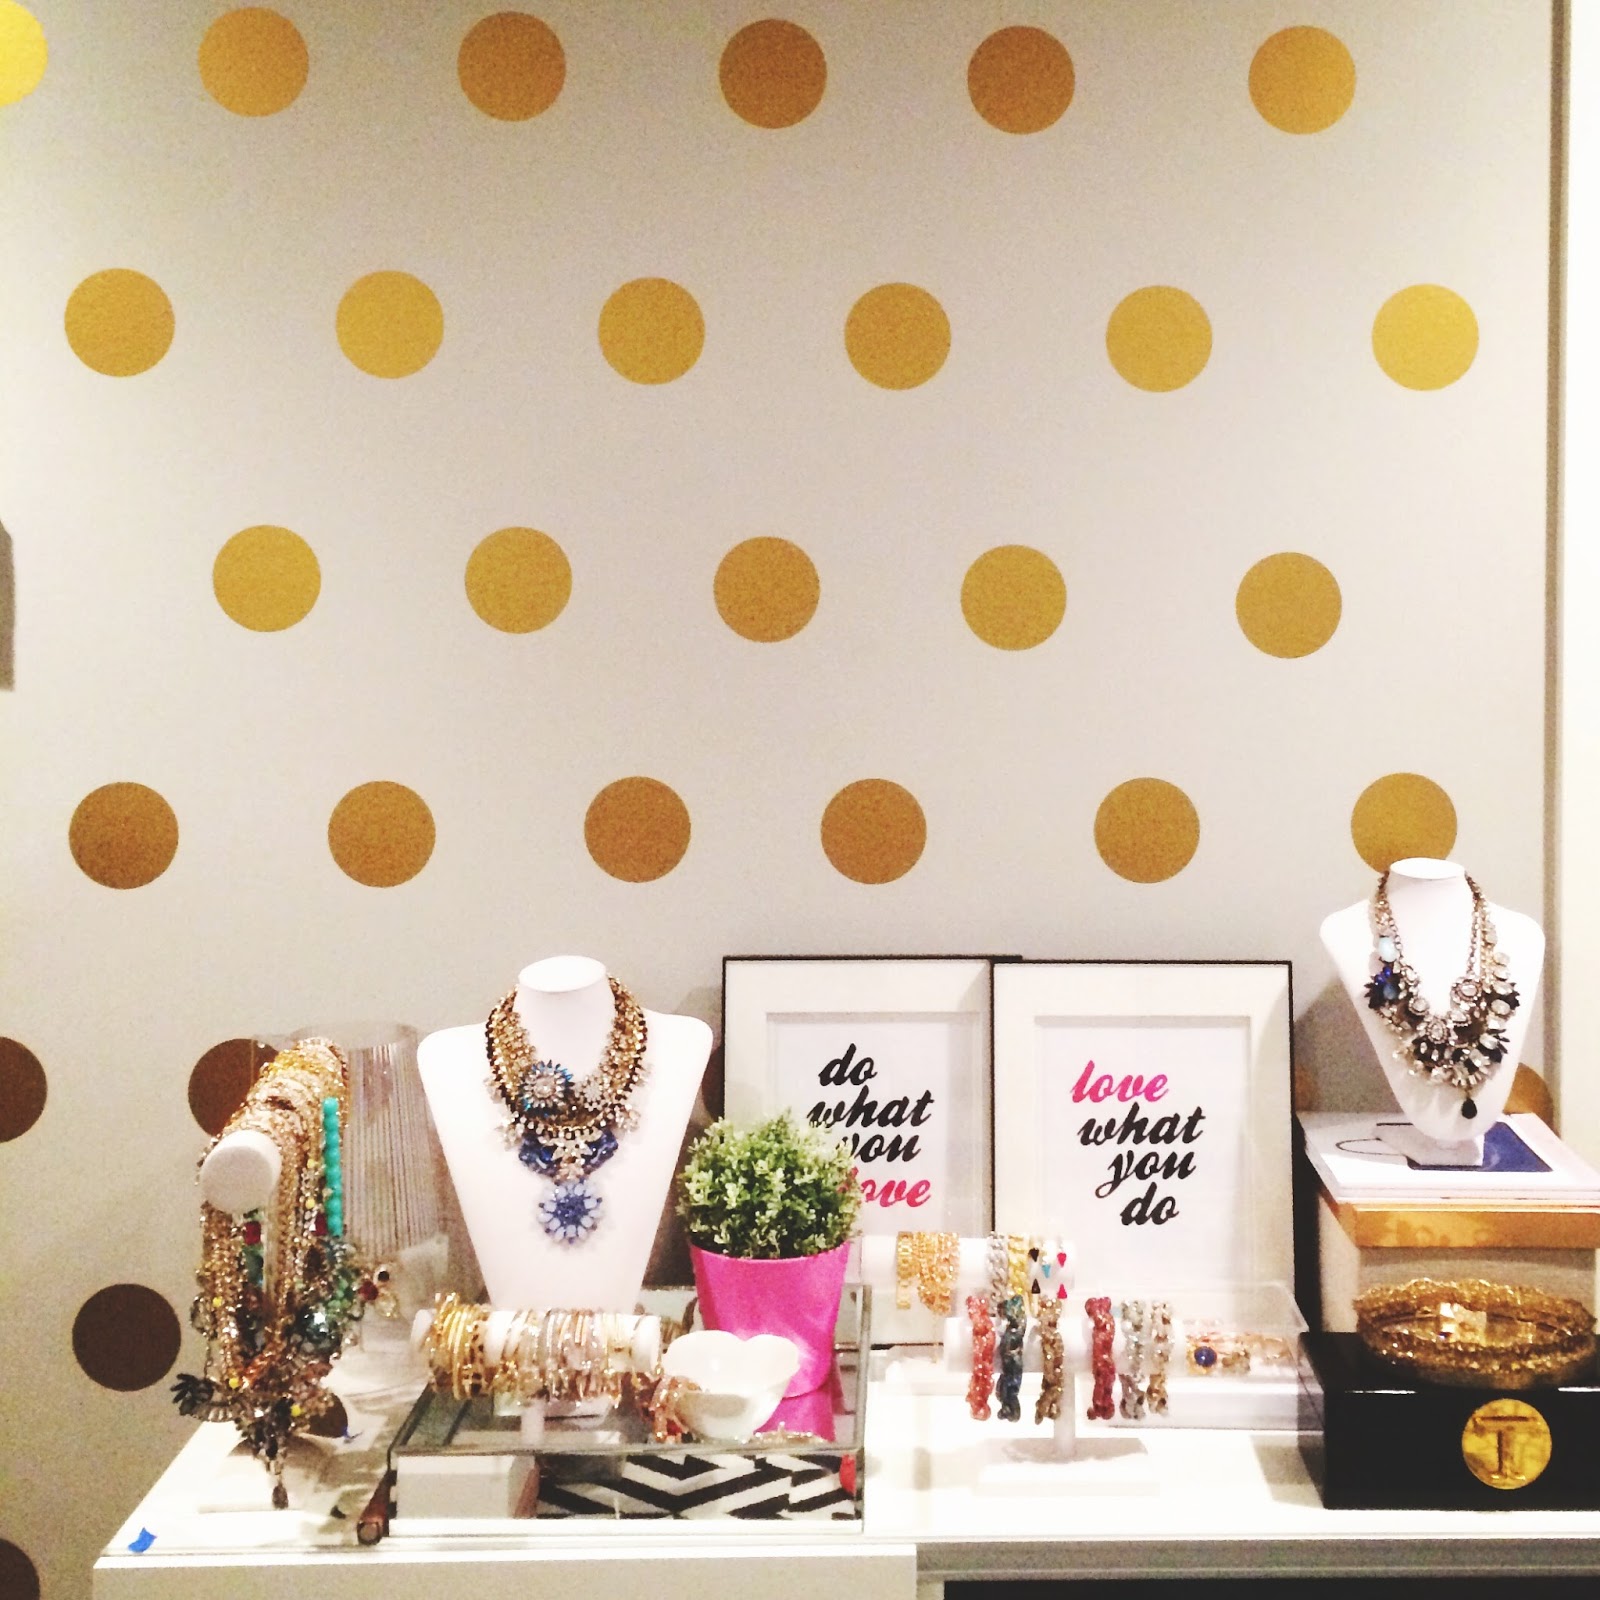
My biggest tip is to cut all the circles individually (it comes in a whole tube like wrapping paper, just cut squares so you can see the circles on the backing).  It's a pain in the ass but you will thank me later when your line of dots are not on all crooked. 

My steps:
1. Measure your wall and determine how many circles you can fit on the width (the entire width so like you'd be laying circle next to circle) split that in half so you now know how many circles you will be using and how many spaces in between.  From there it is much easier to determine spacing between the circles.  (You will have to adjust numbers depending if you want smaller spacing but this worked out for my larger spacing)
2. Once you have the approximate measurements, use painters tape to tape up your circles (you still have not removed it from the backing yet) and mark where you want all your circles.  Stand back and make sure the lines are not crooked or spacing is off.  After you are happy with that, now you know where exactly to put the circles.  Start peeling off the backing and go for it! 

I will say that I did have a few mistakes but the circles were very easy to peel off and put back on.  They are not reusable but they are removable.  So if you make a mistake it will be easy to peel off and put back on right away but if you leave it for a few days, you probably won't be able to reuse it after that. 

{DIY} Conversation Heart Ring

Thursday, February 6, 2014

 photo Valentines-Day-Conversation-Heart-Ring-DIYcopy_zps3473c6c6.jpg
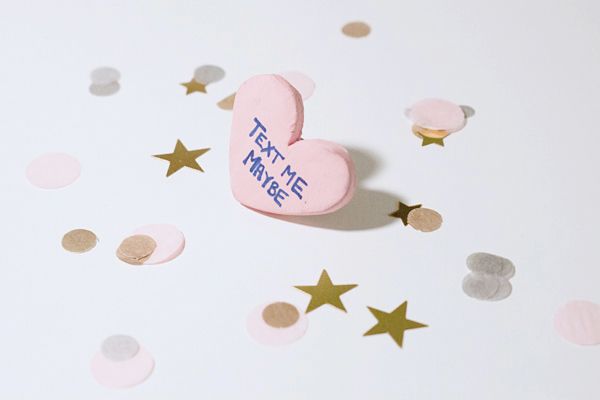
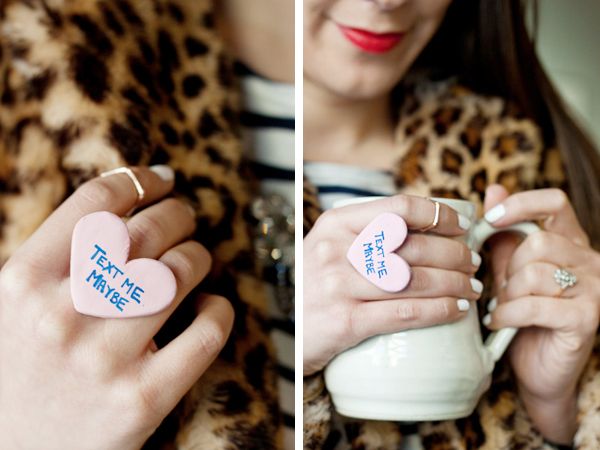
I'm a total sucker for conversation heart candy (but really, who isn't?), so I thought it would be fun to make a ring of my favourite Valentine's treat. It's fun, easy and a super cute way to embrace this time of the year, so if you want to be a cheeseball and join the fun, here's what you've got to do!


 photo ClayRingDIYStep1_zps0fe17b87.jpg
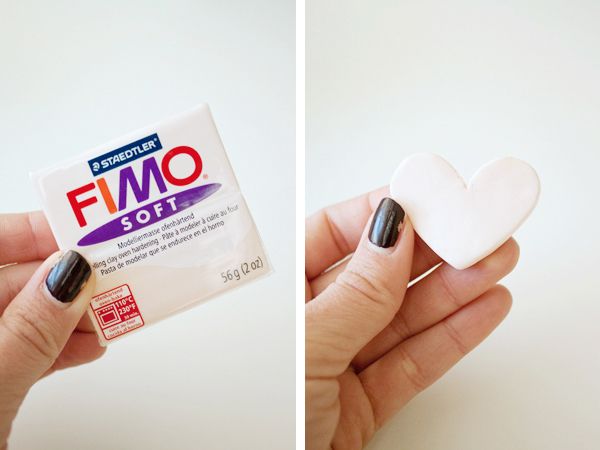
Using soft FIMO clay, warm a small piece between your hands for a few minutes to make it malleable. Roll out the clay and smooth any bumps or ridges from the surface. Using a knife, cut out a heart shape, working the edges so they're smooth and the heart is symmetrical.

When you're happy with your shape, pop that bad boy in the oven and bake it following the package instructions (mine took about 30 minutes to harden). Once that's done, allow the shape to cool fully.

 photo ClayConversationRingDIYStep2_zps778b3e03.jpg
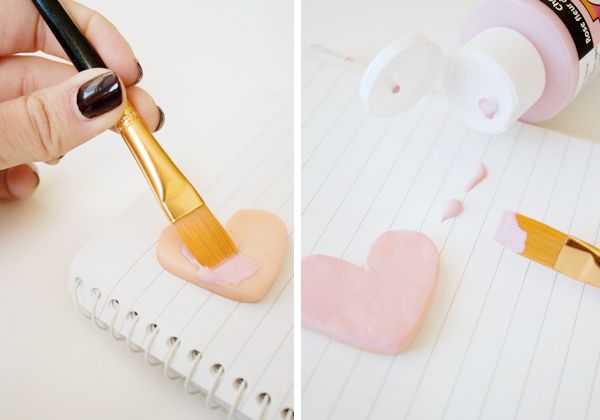
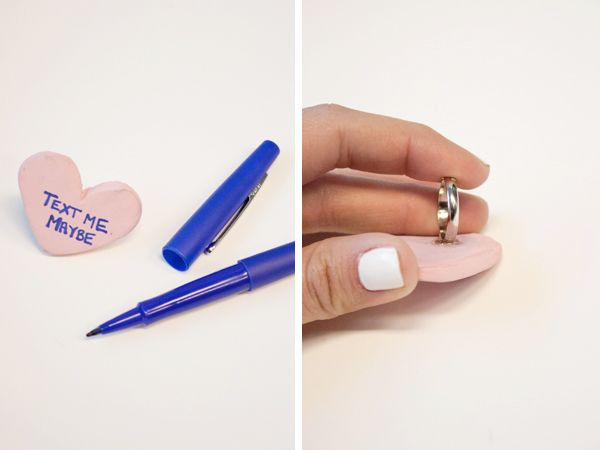
From there, paint the heart using an acrylic paint (you could even use nail polish!). I chose light pink because it reminds me most of the candy, but you can get as creative as you like with this one. Once dry, use a felt tipped pen to write your message. I had a hard time choosing between "Cute Tush," "Hollah At Your Girl" and this one, but "Text Me Maybe" won out in the end, hands down.

 photo ClayConversationRingDIYStep3_zpsd3d51f58.jpg
Let the ink dry for as long as possible to avoid smudging, then glue a ring to the back of the heart, pressing firmly for about 30 seconds to adhere... How easy is that? xx

 photo ConversationHeartRing_zps746a772e.jpg
Final photo by Sam Brooks

{Homemade Holiday} Rosette Ring DIY

Thursday, November 21, 2013

 photo IMG_9136copy_zpsbebffa7a.jpg
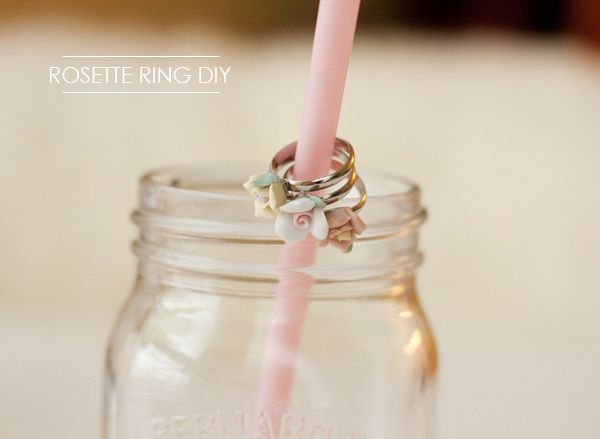
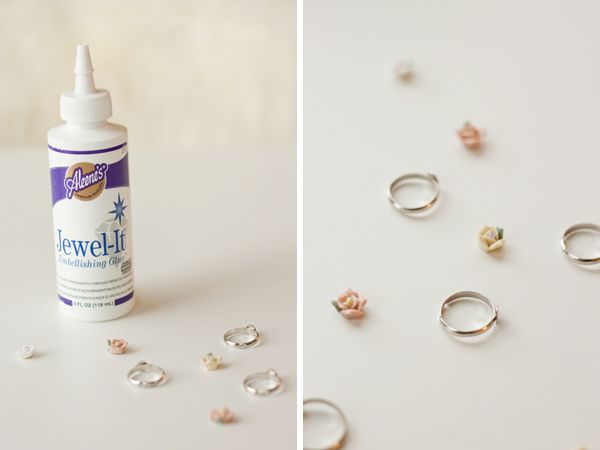
In the spirit of last week's animal ring holder, I thought I would put together an simple gift idea to accompany it — et voila! The rosette ring was born. It's the perfect little add-on to give a girlfriend or pop into a stocking, and it even functions as a last-minute gift if you're in a pinch (oh who am I kidding, when you're in a pinch). So if you want to make a rosette ring of your own, here's what you'll need:

 photo RosetteRingDIYSupplies_zps0f4e4089.jpg
Supplies:
 - Adjustable rings (available at any craft or jewelry supply store)
 - Rosette cabochons (mine are vintage, but there are lots to choose from on Etsy!)
 - Jewelry glue

{Inspiration} Three DIYs To Try...

Tuesday, September 10, 2013

 photo 3DIYsToTry_zps6e0e21f0.jpg

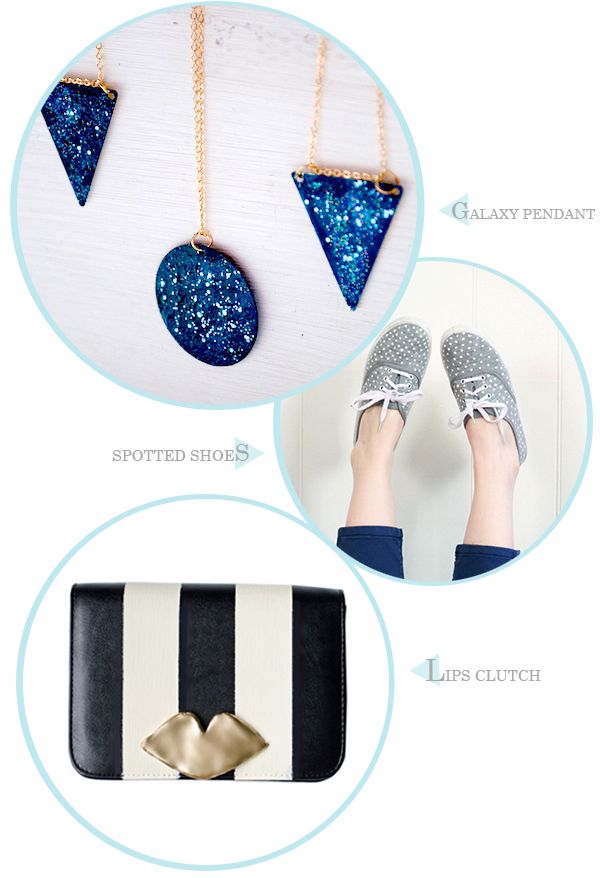
If there were more hours in the day, I would spend them DIY'ing up a storm... Until that happens, however, there's always Pinterest for daydreaming purposes. I scratched the galaxy pendant DIY off my list last night by making one for a friend, which means there might be a lips clutch (an oldie but a goodie!) or spotted shoe project in my near future... But if not, hey — one out of three ain't bad either.

What projects are you guys working on? xx

Galaxy pendant DIY | spotted shoe DIY | Lulu Guinness-inspired lips clutch

{DIY} The "Statement" Clutch...

Wednesday, July 31, 2013

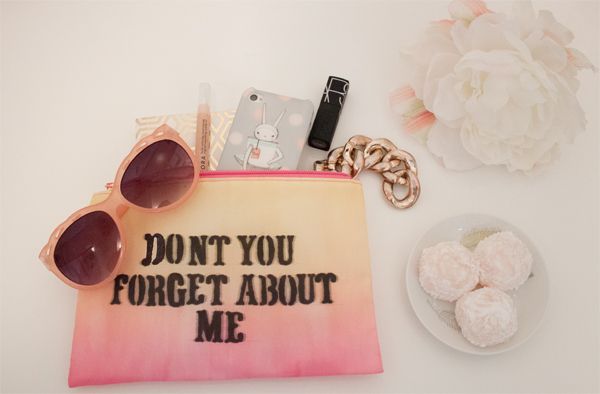
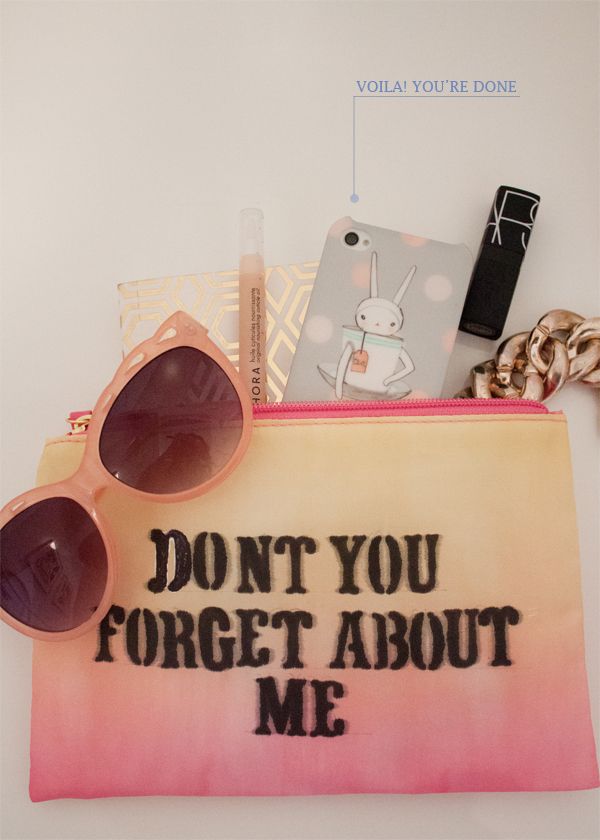
Statement clutch DIY tutorial

It's no secret that I'm a huge fan of the 80's, so when images of cute, statement-packing clutches kept popping up on Pinterest, I couldn't help but make my own version using a lyric from the all mighty Simple Minds... Plus you probably wouldn't want to leave your clutch behind, so it seemed kind of fitting.

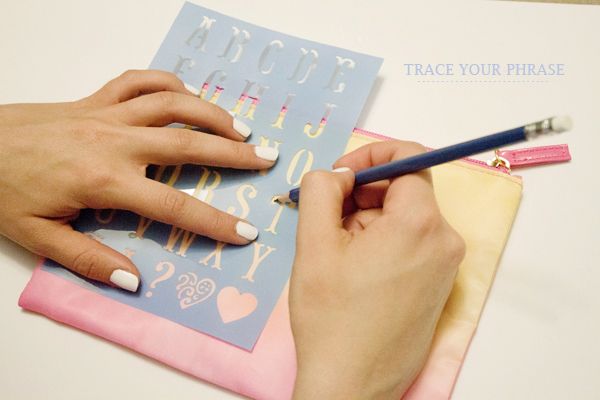
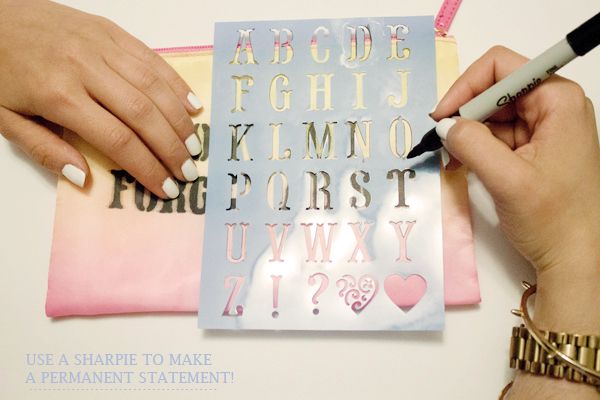
Want to personalize a clutch of your own? Grab your stencils and sharpies ladies, because this one's a breeze!


Statement clutch DIY tutorial Statement clutch DIY tutorial Statement clutch DIY tutorial

{DIY} Striped Makeup Bag...

Tuesday, April 30, 2013

 photo stripedmakeupbag_zpsc6182df7.jpg

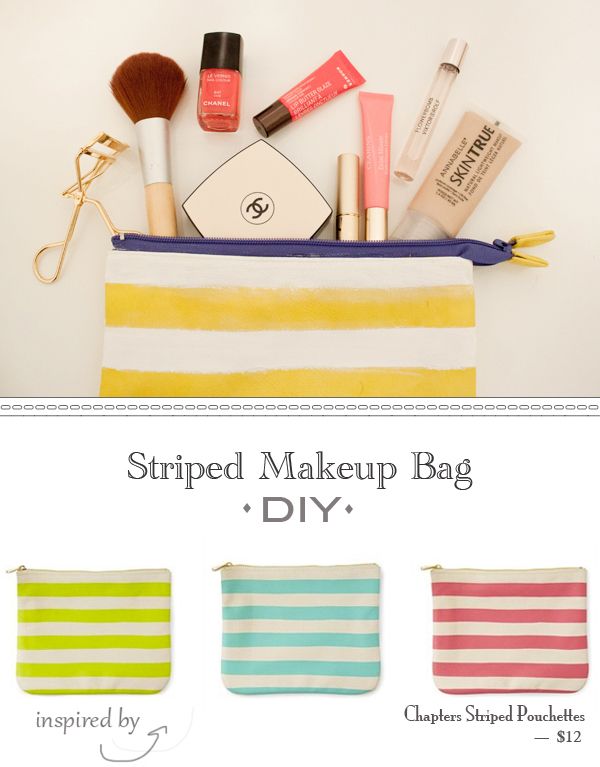
I've been incredibly drawn to the striped pouchettes at Chapters right now, and always stop to admire them whenever I'm in the store. Mr. AiF scolded me last time we were there together with, you know, words of reason and whatnot... Pfffft, AS IF I don't need another makeup bag! What does he know, anyway? Well, I guess something he said must have sunk in, because I decided to revamp this old Zara clutch instead of caving to my baser instincts (to which shopping totally applies) and buying yet another pouch.

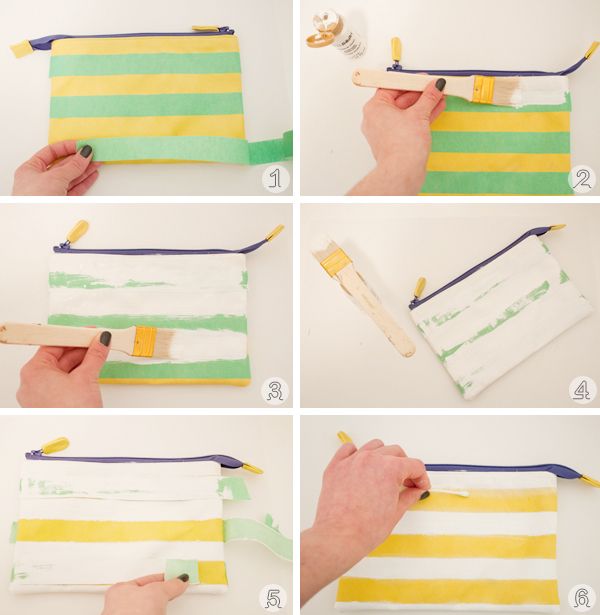
Want to breathe new life into an old bag too? Repeat after me: Tape, paint, dry, remove tape, acetone smudges... It's as simple as that, my friends! xx

  photo makeupbag_zpsf6c9815a.jpg

{DIY} Pom Pom Sweater...

Tuesday, April 23, 2013

 photo IMG_7856-1_zps715922c1.jpg  photo IMG_7889_zps9e6f41a1.jpg  photo IMG_7802_zps53a59590.jpg  photo IMG_7893_zpsc4a39788.jpg  photo IMG_7840_zps8456edd7.jpg

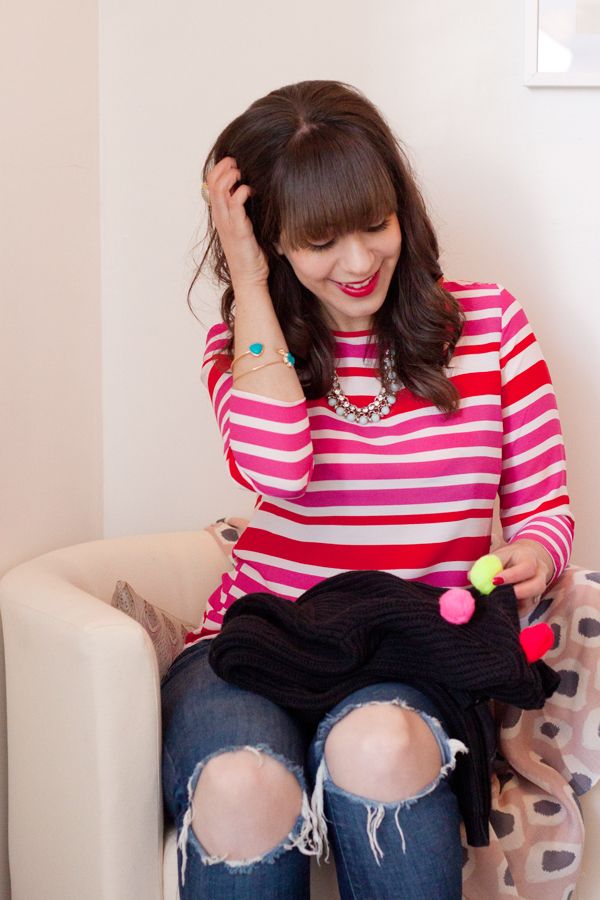
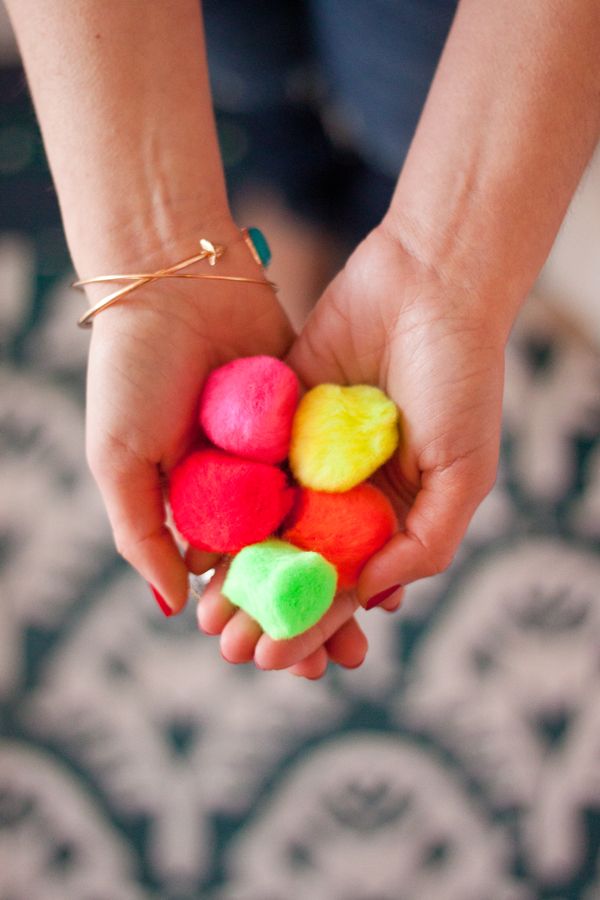
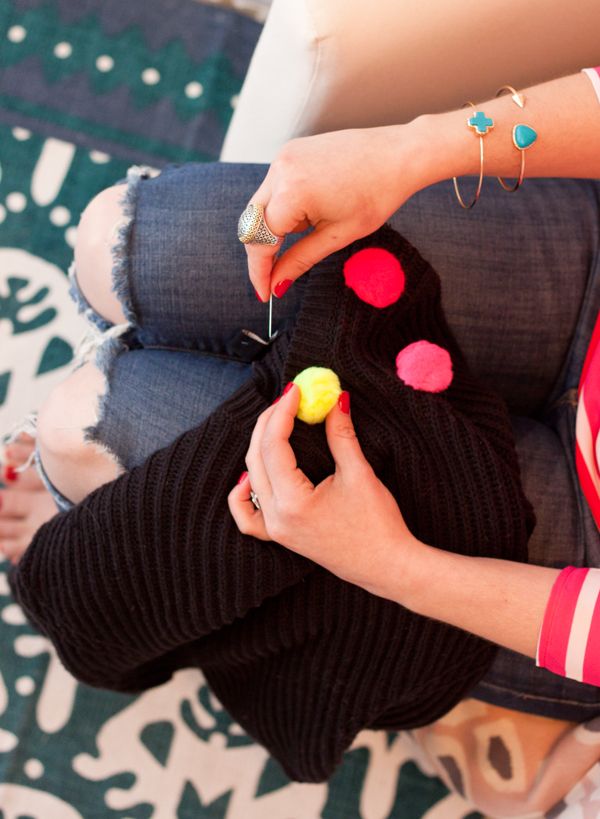
You know when you see something that leaves an impression on you, only to file it away until something triggers it back? Well that's what happened here. I saw this outfit post on Design Love Fest few months ago, squealed in delight (pom poms!) then just kinda forgot about it... Until one fateful trip to the craft store where I spotted a bag of delightfully colorful pom poms just dying to make a DIY appearance.

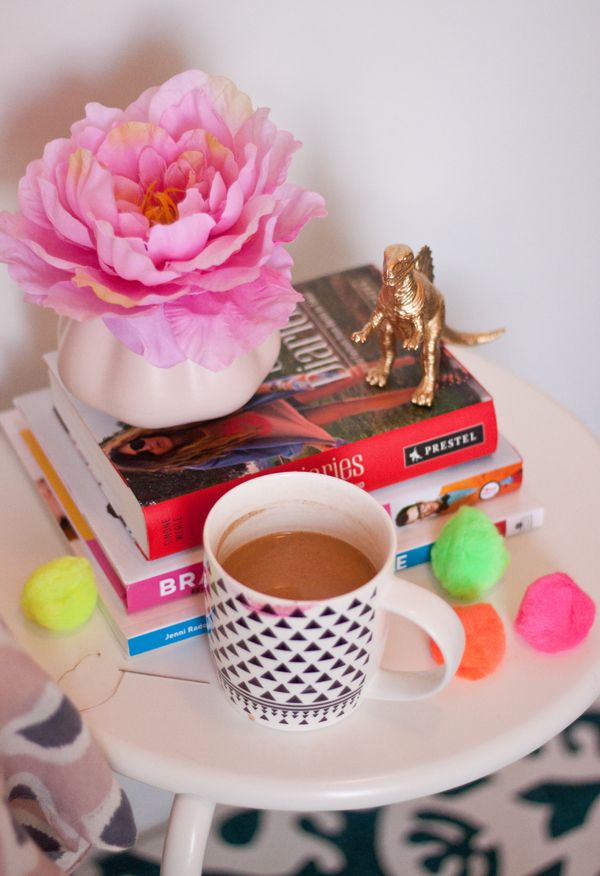
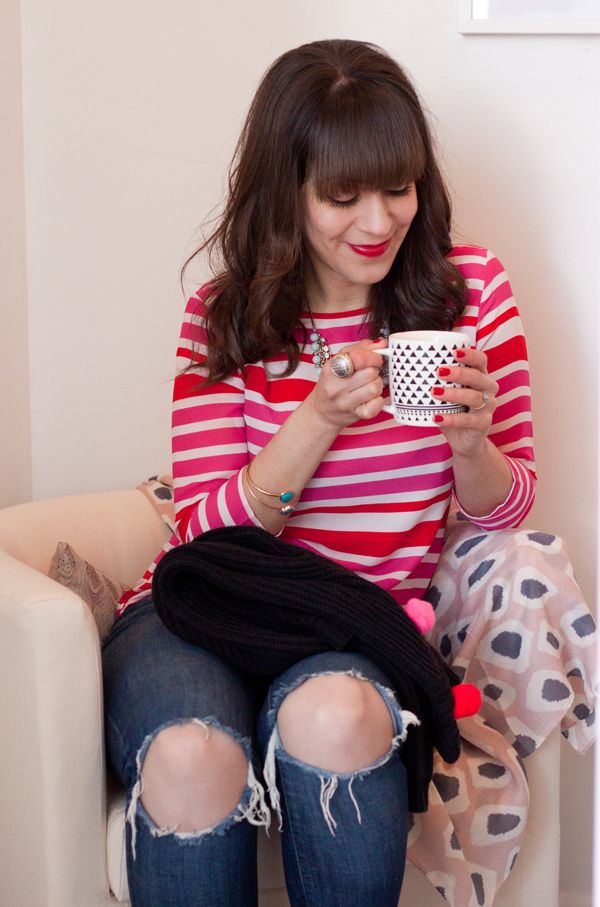
So early Sunday morning I got up, poured myself some coffee and dragged Mr. AiF to my mini home office to get cracking. There's not really much to this DIY (it's sew easy... zing!) so I spared you the step-by-step deets, but here you have it, friends — Pom pom city! Stay tuned tomorrow to see the end result... xx

{DIY} Neon Rope Bangle with Pendant...

Tuesday, April 16, 2013

 photo IMG_7263_zps77b5d46b.jpg

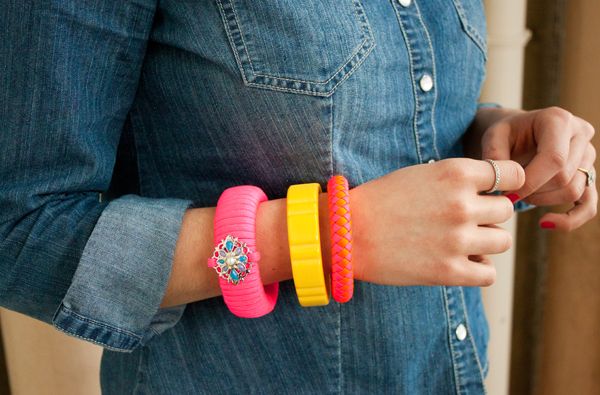
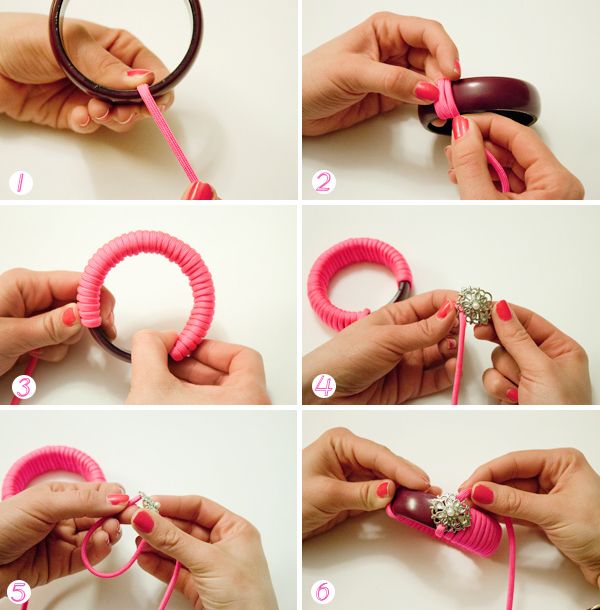
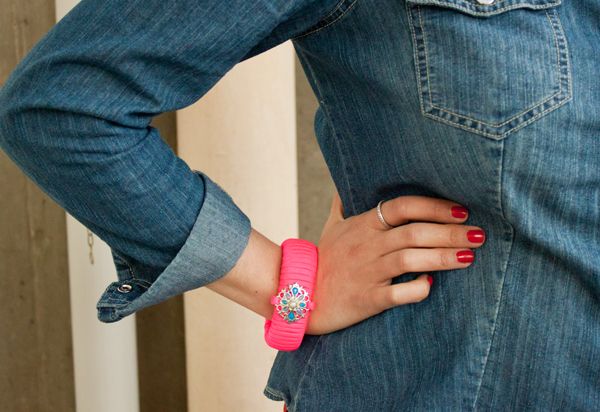
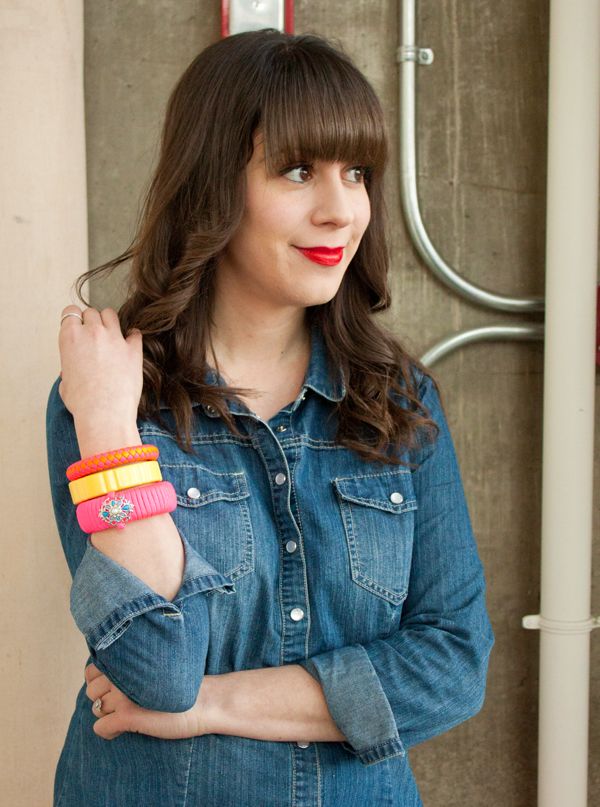
I've been sitting on this DIY for weeks now because I haven't had any spare time to craft... I know, I know, tisk tisk. Anyway, I thought it would be fun to bring life to an old, thrifted bangle, so after picking up some neon thread and a pretty little pendant from Michael's, I was in business. This project was super easy and inexpensive to make, and I'm obsessed with the result... Hey, anything neon is fine by me!

Want to make a bracelet of your own? Here's what you've got to do:

 photo ropebracelet_zps47162e2a.jpg

1. Start by securing the rope to your bangle with some glue to hold it in place while you work. The nature of the materials make them hard to adhere, but it will help to have the end temporarily secured.
2. Start wrapping the rope around the bangle, pulling tight as you go around.
3. Continue to tightly wrap the bangle until you get about three quarters of the way around the bracelet.
4/5. Weave the end of the rope through the pendant and out the other side, pulling it through and positioning it on the bangle.
6. Keep wrapping the bangle until the base is no longer visible.

 photo ropebracelet2_zps36b704a4.jpg

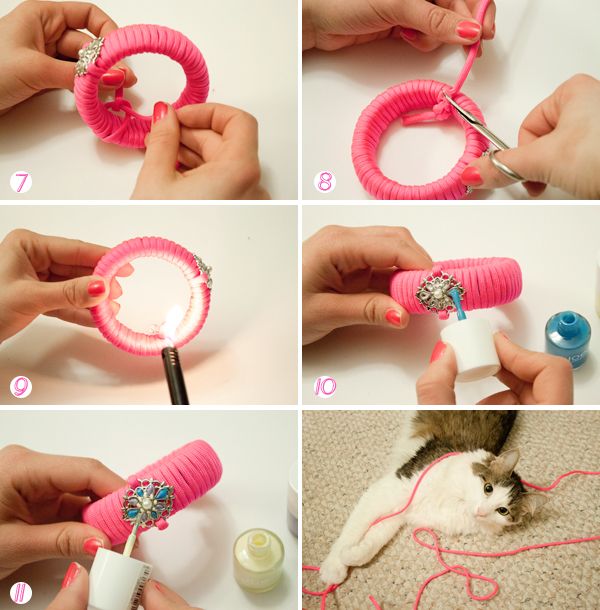
7. Release the glued end and tie a double knot to secure the rope in place.
8. Cut the ends off closely.
9. Singe the ends of rope slightly to avoid fraying.
10/11. Paint the pendant with nail polish in colours of your choosing. Add two or three coats depending on the thickness of the polish used.
12. While your bracelet dries, use the leftover rope to play with your cat or any other willing participant... How cute is Meows?!

 photo IMG_7210_zpsf69c0cfb.jpg  photo IMG_7197_zps03f0fc36.jpg

And that's it! Thanks for reading, lovelies! xx

{Valentine's Week} DIY Glitter Heart Pins & Shoe Clips...

Tuesday, February 12, 2013

 photo IMG_9786_zps327e2759.jpg  photo IMG_9649copy_zps084eb37b.jpg  photo IMG_9604copy_zps90b385de.jpg  photo IMG_9761copy_zpsf30deeec.jpg  photo IMG_9591_zpsed1a4697.jpg  photo IMG_9866copy_zps08e3b1fc.jpg  photo IMG_9699_zps9e85aaab.jpg  photo deets_zpsa12d60c9.jpg

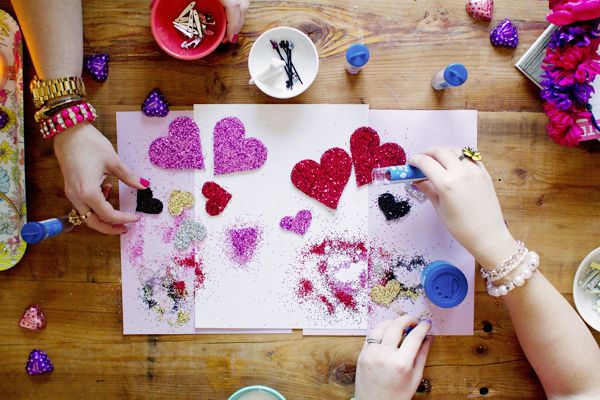
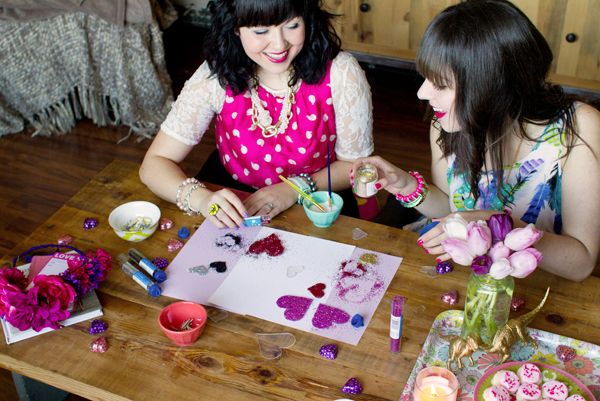
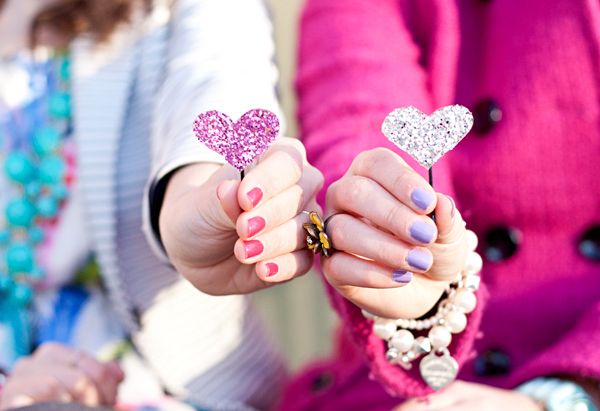
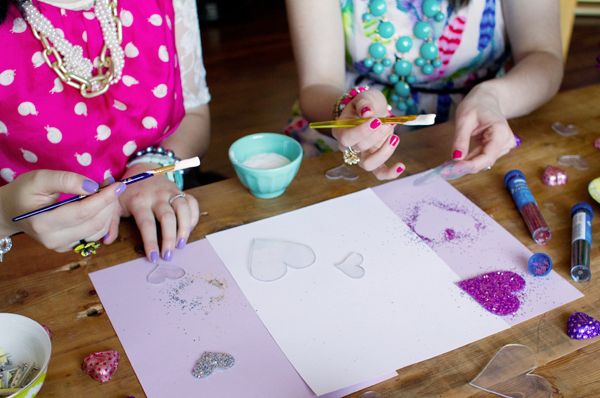
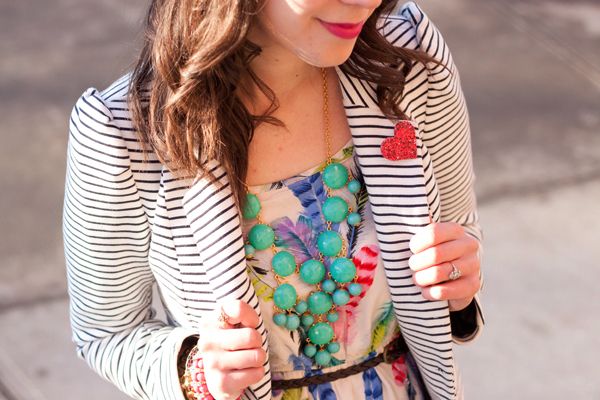
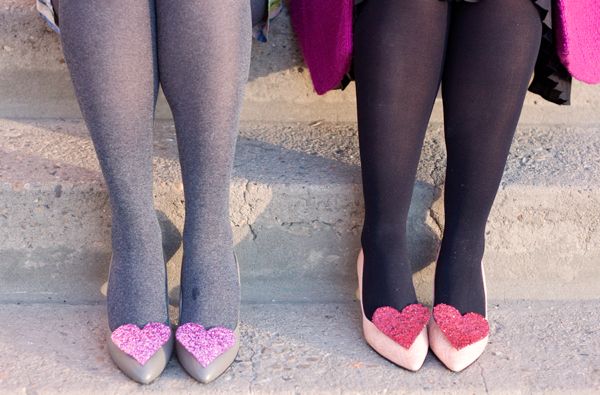
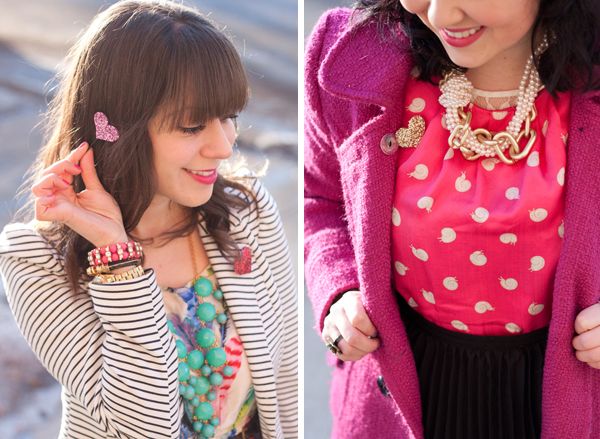
Valentine's day is nothing without a little glitter and a whole lot of hearts, so when Kassie and I found ourselves having an impromptu glitter heart pin and shoe clip DIY session last weekend, it felt completely natural to us. I mean, why wouldn't you sit around gluing sparkly bits to the girliest of girlie motifs with your bestie? Exactly.

Want to make some festive hair pins, brooches and shoe clips of your own? Check out my shrinky dinks DIY for a how-to guide when making your heart base, as well as this glitter watch DIY for Mod Podge instructions. Then simply super glue a pin or clip to the back of your heart (avoiding contact with your skin, unlike Kassie!) and you're ready to rock... Happy Valentine's week, friends! xx

On me: feather dress- Forever 21; striped blazer- H&M; necklace- Ily Couture; pumps & tights- Joe Fresh // On Kassie: top- Anthropologie; skirt- Jason Wu for Target; coat- Old Navy; pumps- vintage; necklaces- Joe Fresh

DIY Magnetic Makeup Palette

Friday, July 13, 2012

So I have to tell you how excited I am about this DIY only because it is something that I desperately needed and I'm so happy that I can make an endless supply of them!  I buy a lot of palettes but it always ends up that I like some colors better than others which is fine, except when I travel, I have to take the entire palette with me just so I can use those 2-3 colors.  My makeup bag ends up bulging with 3-4 different palettes and I know that I don't need to bring all of them but I really like those specific colors.  I did end up buying the UNII Makeup Palettes and depotted quite a few of my shadows but at $27 for each palette, they certainly aren't cheap and I'd almost like to spend that money on more make up, know what I mean?

When I was in Forever 21 I spotted these palettes for under $5 (I think $3.80 and $4.80 to be exact) and I wasn't even attracted to the makeup itself, I just wanted what was holding the makeup!  I loved that it had a mirror too.  I brought them home and brainstormed and figured out a way to make my very own magnetic palettes!

Here's my finished product!  And of course I glittered it too. :)

Read more for the entire tutorial!

You want to know what my secret ingredient is?  Martha Stewart Magnetic Paint!  I didn't even know they made such a thing I just googled it, hoping something like that existed and indeed there was!  Just a tip, if your local craft store is small it's going to be impossible to find it as I found most places here didn't carry it (even my local Jo-Ann's).  I just ended up ordering it on Amazon. 

Even though I wasn't sure it was going to work, I documented the process.  So thank goodness it did work!

First your tools:
Top Row:
  • With your palettes, take out the entire part that is holding the current pans.  In most of the palettes, you can usually find where it's glued together and with a little strength, it's easy to pull off or use a tool to get it underneath and pop it off.
  • Clean the glue residue off the inside of the bottom of the palette. 
Middle Row:
  • Paint the inside with the magnetic paint (it took me about 4-5 coats before I was happy with the magnetic-ness.  I tested my magnets to make sure it stuck.  You can paint coats every 2-3 hours but once it's done, let the paint dry overnight.
  • Take your palette and depot the pans.  This palette was easy as it popped right off.  It was just a bit of glue on cardboard but some are harder to depot.  (I'm not going to get into depotting as that it's own animal but google "depot eyeshadow" and you'll find tons of tutorials)
  • Cut the magnet sheet to the size as needed.  Stick the adhesive side to the bottom of the pans.
Bottom Row:
  • Fill your pans to see how it looks/fits and if the magnets are sticking well.  
  • You could stop here if you didn't care what the outside of your palette looks like.
  • I have so much glitter left over from my previous glitter projects (here and here) so I wanted to use it and make my palettes even prettier.  (ha! I just love any excuse to glitter!)
  • I've gotten a lot of questions about the mix of glitter to mod podge.  You want to make sure that all your specks of glitter are covered in mod podge.  This is how you ensure the minimal fall out.  1 parts glue to 2 parts glitter is what I aim for.
  • If you have your pans still in the palette, take them out before doing any painting.
  • Coat in glitter and let dry between coats.  Paint until every single area is covered in glitter!
  • Instead of glittering it, you could also just paint the case and it would look just as cute.
 And there you go!  A glittery, magnetic case that you can change out the pans to suit your different looks!

Here it is with a few other items that I keep in my hangbag so you can see the size.  It fits in perfectly don't you think? :)
Clockwise: Rebecca Minkoff pouch | DIY Palette | L'Occitane Lip Shine | REVLON Lip Butter | Kate Spade card holder

*If you are wondering about my makeup palette that I depotted, it is this Hello Kitty for Sephora palette.  I loved the colors but hated how big and clunky the case was so I rarely took it out to use it.   Now that I've depotted all the makeup, I've got a fun case to hold other stuff and am actually using the palette now.

Glitter... Everything!

Tuesday, February 7, 2012

Ever since I made my glitter clutch, I've been looking around at everything that we have around the house that I can glitter.  I told you I had a lot of glitter projects to share, I finally gathered them together to photograph!

First up are these little tea light holders that were totally boring on their own...
 
I put together a mixture of Mod Podge and glitter (same as the glitter clutch) but this time I dumped the mixture in the candleholder, swirled it around until it covered every area and then let it dry upside down for a day.  Now, they are adorable and I keep one in the bathroom to hold my bobby pins which has made my life so much easier when doing my hair!  Obviously the other thing I glittered was my iPhone case.  I had a freebie case that I wasn't using from when Apple was giving out free cases (because of the antenna issue).  A plain black case instantly turned into something very girly and glam that I use all the time now!  (I just used the mixture and dipped a foam brush into it and painted the mixture right onto the case.  It needed about 3 coats.)

*A note on the tea light holders, you can still use tea lights in them even with the glitter, just get the battery operated ones. They look just as cute and they even flicker a little!  I have ones that I always keep in my candle holders.

I buy a ton of candles and always try to keep the jars once they are done being candles because they are great storage holders (I use a few to hold my makeup brushes).  So instead of just cleaning it out and leaving it as is, I glittered it!  I used a different glitter than the Martha Stewart for this one and it was a very fine, almost powdery glitter which I didn't like as much.  It took many more coats to get it to be that glittery.  The Martha Stewart glitter is the perfect consistency and opaque which I think looks better.  To clean out almost empty candle jars, boil a pot of water with about an inch or two of water (depending on how big your candle jar is and how much wax is left) and put the candle in the pot.  It will melt the remaining wax in the jar and then you can dump the wax straight into the garbage and then wash the container out.  Use a fork to scoop out the wick holders.
I filled it with my lipglosses and lip liners.  Now my bathroom has a lot more glittery additions! And lastly, a jam jar converted into a gold pencil holder that makes my desk much more fun!

There are so many things you can do with Mod Podge and glitter. Just look around your house, I'm sure you'll find as much stuff as I did!
testking - http://testking.com pass4sure - http://www.pass4sure.com/CCNA-Voice.htmlactualtests - http://actualtests.com/ realtests - http://www.realtests.com/exam/350-018.htmtestkingworld - http://www.testkingworld.com/640-911.asp

DIY Glitter Clutch

Thursday, December 15, 2011

Do you remember this clutch from this lookbook?Rag_Bone_Jeans
Well, now it looks like this! DIY_clutch2
I made it gold and glittery!  I LOVE it!!  


You see I've been in love with the gold sequin Zara clutch that I've seen on a ton of bloggers (seen here on my sister) and all over Pinterest.  But I missed out on getting it online and don't have a Zara nearby so I was searching for other cute sparkly clutches when I thought, "why don't I just make one?" I wasn't super attached to the yellow clutch so thought it would be the perfect canvas to make it glittery.  Obviously the Zara one is covered in sequins but I did glitter because it was easier but just as pretty.  Pictures don't do this baby justice, it looks amazing in person!


What you need:
  • Clutch
  • Mod Podge
  • Very Fine Glitter - I used Martha Stewart Glitter (and after this project, I'm seriously considering buying this set of all of the colors! I want to glitter everything now!)
    *You could try chunky glitter if you want the look of the clutches above.  I'm not sure how it will turn out but I do like the smoothness of mine. 
  • Foam Brush
  • Bowl
  • Patience :)

    I don't have step by step pictures because I did this over two days and it was kind of a trial run for me anyway, but you don't need the pictures because it's super easy.
    1. Mix the glitter and Mod Podge into a bowl (I lined my bowl with foil so that it wasn't a sticky mess and clean up was easy.) I'd say 1 parts glue to two parts glitter is good.  I just eyeballed it though until I thought you could see enough glitter through the glue mixture.  You want more glitter because when it dries you want as much glitter stuck on as possible, otherwise you'll have to do way more coats.
    2. Start painting the clutch with the foam brush.  Do only one side!  When you paint it on, it will be all white and goopy, don't worry, it dries clear and all you see is glitter.
    3. Wait 20 minutes or longer until it's dried and you see the glitter.
    4. Wash your brush thoroughly between layers of painting because you don't want your brush to get hardened and not be able to paint anymore.
    5. Paint the next layer with the same mixture.
    6. Repeat steps 3 - 5 until the entire surface is covered in glitter or until you are happy with how it looks!
    (I wasn't sure how much Mod Podge and glitter I needed so I just bought the big sizes of both, but ended up using about only 1/3 of both of them.)

    Tada!  That's it.  Mine took about 4 coats on each side.  My clutch has a zipper on the back and I just painted over the entire thing so you can't open the zipper anymore but it didn't matter that much to me.  I never used that back pocket anyway.

    The best part about doing it this way is that there is no glitter fall out!  I have been leaving this clutch all over the place, on our dining room table, on the couch, on my bed and no glitter has fallen off.  Hubs loves it because usually when I do glitter projects, we find glitter EVERYWHERE.  haha!  And it's great because it doesn't come off on your hands.  Now I have the perfect glitter clutch for the holidays!
    DIY_clutch
    Have fun and let me know if you try it too! I'd love to see how yours turn out :)  I actually ended up glittering a few other things so will share them soon!


    testking - test king 642-467 1z0-051 E20-329 dumps E20-515 000-087 642-747 350-001 comptia 70-680pass4sure - http://www.pass4sure.com/test/sat-subject-tests.htmlactualtests - actual tests 350-018 650-196 650-367 braindumps 70-246 70-463 650-153 E20-553 a+ certification OG0-093realtests - http://www.realtests.com/exam/646-205.htm testkingworld - http://www.testkingworld.com/70-680.asp