Suede duffel bag- Topshop (new version) | tank- ACNE | jeans- Gap | bangles- J.Crew + Hudson's Bay | lipstick- Stila's 'Beso'
I briefly showed you guys this gem of a bag during last week's mini haul, but I just couldn't resist introducing you to her once again, and in a little more detail... I mean seriously, isn't she a beaut?! Not to get all Helen Hunt up in here, but I'm mad about you, little Topshop bag (weird reference?). In fact, I've coveted it since spotting it on Anna a while back, but since my local TS didn't seem to carry it, I came to terms with the fact that we would never be together... Long story short, I happened upon it while in Vancouver, ON SALE and waiting for me — kismet.
Now sadly this bag is sold out (I know, I'm sorry!), but fret not my friends — she has a sister! Equally cute and something of a fall counterpart, this version ain't half bad... I'm officially tempted. xx
Photos by Mr. AiF
Showing posts with label accessories. Show all posts
{DIY} Five Minute Pom Pom Clutch
Tuesday, July 22, 2014
Remember how I said last week's DIY was the easiest thing ever? Well I think a pattern may be developing here. I don't know if it's the summer heat or the fact that I've been pressed for time lately, but I'm all about any project that can be whipped up in five minutes flat. The best. So if you have an old clutch lying around that could benefit from a little pom pom-based upgrade, this DIY is for you!
SUPPLIES: CLUTCH | POM POMS (VIA MICHAELS) | E-6000 GLUE
TIME: 5 MINUTES (1 HOUR DRY TIME) | DIFFICULTY LEVEL: EASY
I thought it would be fun to alternate black pom poms with slightly larger (and incredibly sparkly) gold ones, but pick whatever colors accentuate your clutch best. You could even play around with the spacing or color placements, so get creative! Add a generous amount of glue to the back of each pom pom and press firmly for several seconds to adhere.
Let the glue dry for about an hour, and you should be good to go! Depending on the material of your clutch, you may want to sew the back end of each pom pom to make sure they stay in place, but since I glued my pom poms to my clutch's plastic clasp, this step wasn't necessary for me... just do what works for you, and remember: If a pom pom falls off, you could always glue it back on! #lowmaintenance
Photos by Adventures in Fashion
SUPPLIES: CLUTCH | POM POMS (VIA MICHAELS) | E-6000 GLUE
TIME: 5 MINUTES (1 HOUR DRY TIME) | DIFFICULTY LEVEL: EASY
I thought it would be fun to alternate black pom poms with slightly larger (and incredibly sparkly) gold ones, but pick whatever colors accentuate your clutch best. You could even play around with the spacing or color placements, so get creative! Add a generous amount of glue to the back of each pom pom and press firmly for several seconds to adhere.
Let the glue dry for about an hour, and you should be good to go! Depending on the material of your clutch, you may want to sew the back end of each pom pom to make sure they stay in place, but since I glued my pom poms to my clutch's plastic clasp, this step wasn't necessary for me... just do what works for you, and remember: If a pom pom falls off, you could always glue it back on! #lowmaintenance
Photos by Adventures in Fashion
ALL ABOUT THE HAT
Wednesday, July 16, 2014


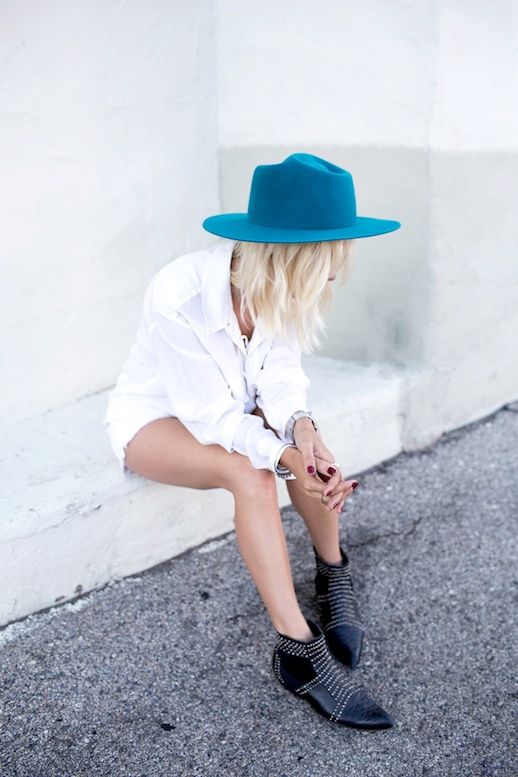
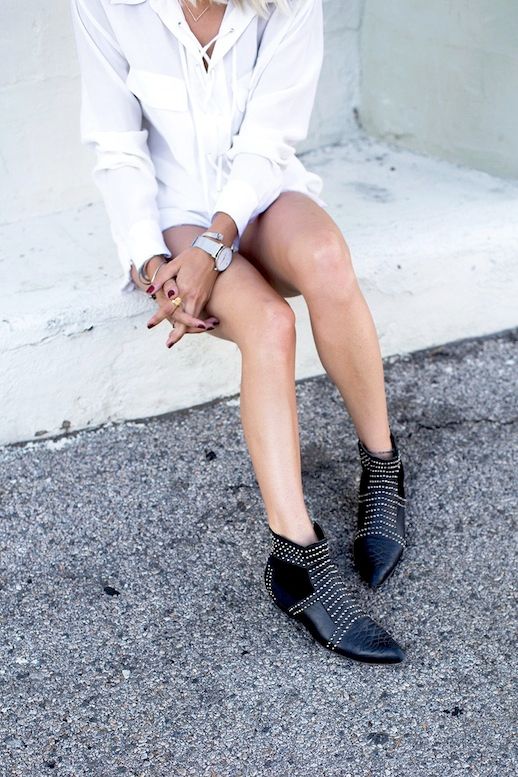
Photos via: Always Judging
One thing's for sure, Courtney is always rocking amazing hats and this blue beauty is no exception. It goes so well with her white-on-white look, plum nails and studded boots.
Get the look:
+ Borsalino Velour Lapin Felt Hat
+ Equipment Knox Lace Up Silk Top
+ Essie Nail Polish in Carry On
+ Larsson & Jennings CM Watch
+ Paige Denim Catalina Short
+ Anine Bing Boots With Silver Studs
{WW} The Paper Bag Clutch
Clutch- Choies | Tshirt- H&M | boyfriend jeans c/o American Eagle | sunnies- Kimono (borrowed from The Pretty Secrets) |
ring + bangles- Hudson's Bay
I'm kind of in love with the whole paper bag clutch trend right now, and when it happens to come in the form of neon, all the better. This one in particular is great because it's spacious and very affordable (under $30!), making it the perfect way to ease into the look... And if you're feeling particularly industrious, check out this DIY project — mad respect for anyone who tries it!
Happy Wardrobe Wednesday love bugs, and thanks for reading! xx
Photos by Sandy Joe Karpetz
ring + bangles- Hudson's Bay
I'm kind of in love with the whole paper bag clutch trend right now, and when it happens to come in the form of neon, all the better. This one in particular is great because it's spacious and very affordable (under $30!), making it the perfect way to ease into the look... And if you're feeling particularly industrious, check out this DIY project — mad respect for anyone who tries it!
Happy Wardrobe Wednesday love bugs, and thanks for reading! xx
Photos by Sandy Joe Karpetz
{WW} Summer Stripes
Wednesday, June 25, 2014
Tank- J.Crew | boyfriend jeans c/o American Eagle | heels c/o Sole Society | striped clutch- Coach | necklace- Zara | ring- CC Skye | bangles- J.Crew | watch- Michael Kors
What is it about stripes that just screams summer? Maybe there's some residual excitement from all those Breton top sightings (IRL and on Pinterest) — or the fact that they seem to creep up on every beach bag from here to J.Crew — but the summer appeal of the stripe is undeniable. Add some yellow to the mix, and you may as well be poolside, girlie drink in hand.
I was particularly taken by this little clutch from Coach, and although not typically a fan of the brand, I just couldn't resist it's feminine charms... seriously though, the stripes! That colour! The size! I am only human, after all. Sorry Mr. AiF — the little striped bag made me do it. xx
Photos by Brittney Leblanc
What is it about stripes that just screams summer? Maybe there's some residual excitement from all those Breton top sightings (IRL and on Pinterest) — or the fact that they seem to creep up on every beach bag from here to J.Crew — but the summer appeal of the stripe is undeniable. Add some yellow to the mix, and you may as well be poolside, girlie drink in hand.
I was particularly taken by this little clutch from Coach, and although not typically a fan of the brand, I just couldn't resist it's feminine charms... seriously though, the stripes! That colour! The size! I am only human, after all. Sorry Mr. AiF — the little striped bag made me do it. xx
Photos by Brittney Leblanc
{DIY} Threaded Chain Bracelet
Thursday, May 29, 2014
Remember how I said I was making my way through my supply box, trying to use up as many odds and ends as possible? Well, that's how this little chain bracelet came to be. Random scraps of chain? Check! Thick thread that I have no idea what else to do with? Uh huh. Enough jump rings to last a lifetime? You know it! So whether you have miscellaneous bits you want gone, or you just plain like the way this bracelet looks, read on for full instructions!
SUPPLIES: CHAIN | THREAD | JUMP RINGS | CLASP | SCISSORS | LIGHTER | PLIERS
TIME: 10 MINUTES | DIFFICULTY LEVEL: EASY
Start by measuring the chain so it fits loosely around your wrist, removing any excess. Cut a long strip of thread and tie it to the end of the chain, ensuring that the knot falls in the mid point of the thread's total length. You're going to want the two pieces of thread to be at least twice as long the chain itself.
From there, keep knotting the thread loosely until you have enough to span the length of the chain. When that's done, weave the knotted thread through the chain.
Double knot the end of the thread when you're done, and trim the remaining thread to your desired length. Gently singe the tips of the excess thread with a lighter to seal them together.
Sidenote: You might need to do this again after wearing the bracelet — mine started to fray after the second wear.
Add your jump rings and clasp, and you're ready to rock! How's that for an easy way to use up supplies?
Photos by Adventures in Fashion
SUPPLIES: CHAIN | THREAD | JUMP RINGS | CLASP | SCISSORS | LIGHTER | PLIERS
TIME: 10 MINUTES | DIFFICULTY LEVEL: EASY
Start by measuring the chain so it fits loosely around your wrist, removing any excess. Cut a long strip of thread and tie it to the end of the chain, ensuring that the knot falls in the mid point of the thread's total length. You're going to want the two pieces of thread to be at least twice as long the chain itself.
From there, keep knotting the thread loosely until you have enough to span the length of the chain. When that's done, weave the knotted thread through the chain.
Double knot the end of the thread when you're done, and trim the remaining thread to your desired length. Gently singe the tips of the excess thread with a lighter to seal them together.
Sidenote: You might need to do this again after wearing the bracelet — mine started to fray after the second wear.
Add your jump rings and clasp, and you're ready to rock! How's that for an easy way to use up supplies?
Photos by Adventures in Fashion
{DIY} Five-Minute Shoe Clips
Tuesday, May 20, 2014
A few weeks back, a friend and I were doing a little window shopping downtown when we spotted some super cute pumps with beaded, floral embellishments. My first thought was that I needed them in my life, while my second thought was that Mr. AiF would murder me if I brought yet another pair home. Third thought? You guessed it — DIY!
SUPPLIES: FLORAL PENDANT NECKLACE | PLIERS | CLIPS | E-6000 GLUE
TIME: 5 MINUTES (ABOUT 30 MINUTES TO DRY) | DIFFICULTY LEVEL: EASY
I had seen this necklace at Forever 21 and filed the memory of it away until my little shoe-clip light bulb moment. So off I went to grab it for this project, discovering that all the necklaces in this style were missing at least one stone — guess who no longer felt remorse over buying something to just turn around and dismantle it? This girl. So step one after procuring said necklace: Take that sucker apart.
The next step is to adhere a shoe clip to the base of each pendant using some E-6000. Side note: I sourced my clips from Michaels, but you can find them at other craft and jewelry supply stores... Anyway, after pressing firmly on the clips to help them adhere to the pendant, let them dry for at least 30 minutes before taking them out for a stroll (but really, the longer the better).
So to summarize: Easy, affordable and a great way to get extra mileage out of your shoes (as well as something to do with all those busted-up necklaces) — not too shabby for a five minute DIY, huh?
Photos: Adventures in Fashion.
SUPPLIES: FLORAL PENDANT NECKLACE | PLIERS | CLIPS | E-6000 GLUE
TIME: 5 MINUTES (ABOUT 30 MINUTES TO DRY) | DIFFICULTY LEVEL: EASY
I had seen this necklace at Forever 21 and filed the memory of it away until my little shoe-clip light bulb moment. So off I went to grab it for this project, discovering that all the necklaces in this style were missing at least one stone — guess who no longer felt remorse over buying something to just turn around and dismantle it? This girl. So step one after procuring said necklace: Take that sucker apart.
The next step is to adhere a shoe clip to the base of each pendant using some E-6000. Side note: I sourced my clips from Michaels, but you can find them at other craft and jewelry supply stores... Anyway, after pressing firmly on the clips to help them adhere to the pendant, let them dry for at least 30 minutes before taking them out for a stroll (but really, the longer the better).
So to summarize: Easy, affordable and a great way to get extra mileage out of your shoes (as well as something to do with all those busted-up necklaces) — not too shabby for a five minute DIY, huh?
Photos: Adventures in Fashion.
{DIY} Faux Geode Studs
Tuesday, April 29, 2014
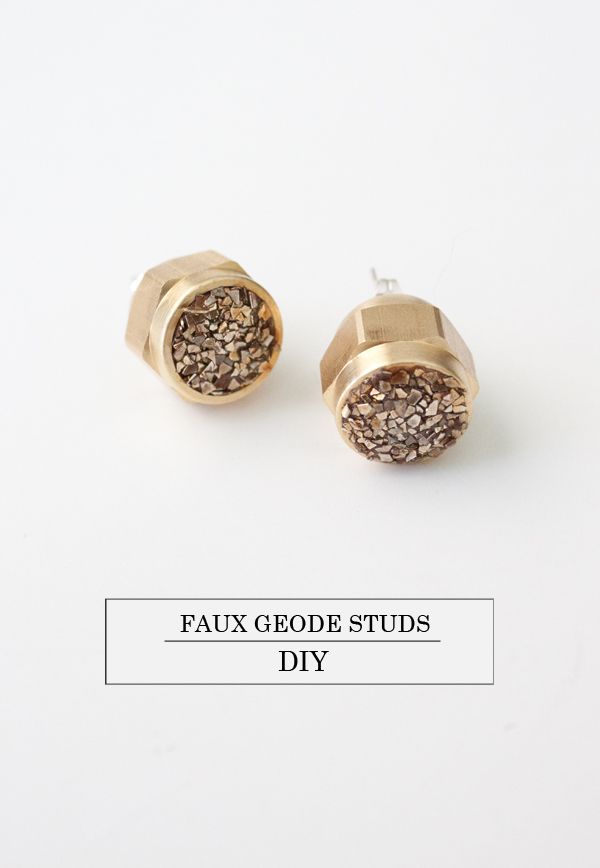
My love affair with clay seems to still be going strong, this time in the form of faux geode studs... Seriously though, how cute are they? I think my favourite thing about them is the fact that they required a trip to the hardware store (uncharted territory!), yet the finished product is as prim and proper as can be... Go figure. So grab your flare caps (I'm as lost as you are) and your glitter, because we're getting our geodes on today, ladies!
SUPPLIES: FIMO CLAY | GLASS GLITTER | FLARE CAPS | E-6000 GLUE | EARRING POSTS AND BACKS
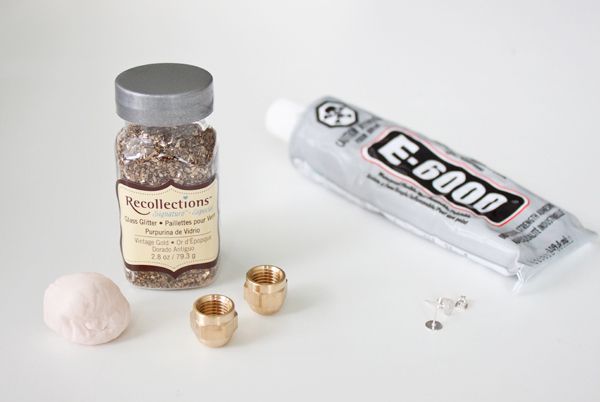
TIME: 1.5 HOURS (WITH DRY TIME) | DIFFICULTY LEVEL: EASY
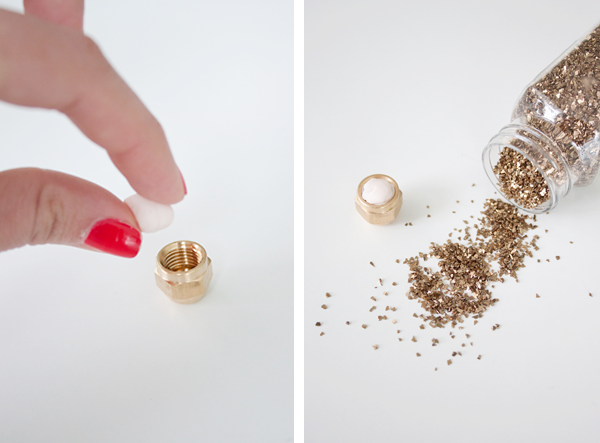
As always, start by massaging your FIMO clay slightly to soften it up... We want it to adhere to as much of the glitter as possible, so don't skip this step. Once that's done, place a small amount of the clay into each flare cap and press down slightly.
TIP: Buy the smallest flare caps available, otherwise they'll be too heavy to sit on your ear lobes properly.
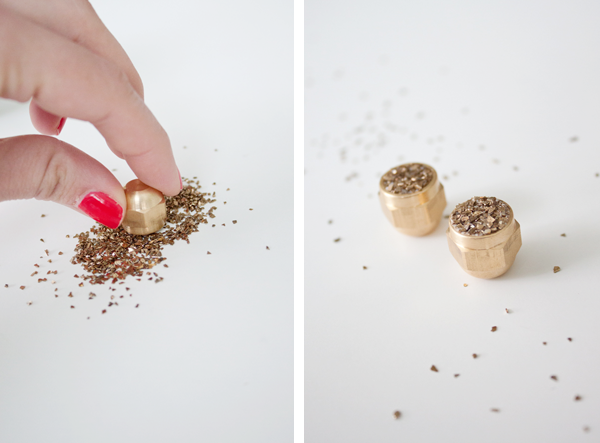
Using glass glitter (I found mine at Michaels), press the clay onto the glitter, taking care to ensure that the FIMO is entirely coated. Once you're satisfied with how your studs-to-be look, pop them into the oven (yup, flare cap and all!) and bake them as per the package instructions (about 30 minutes).
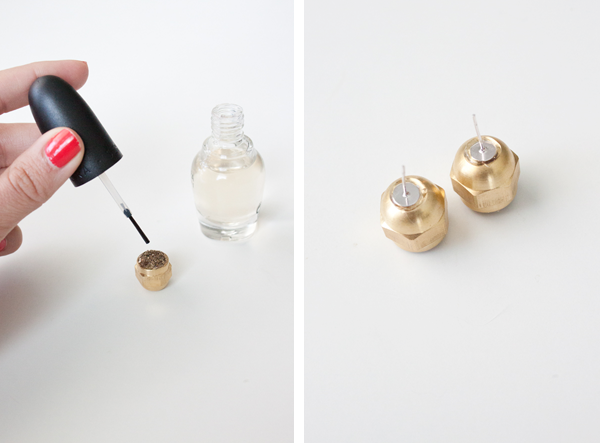
Once everything has fully cooled, apply a generous coat of clear nail polish or Mod Podge to the glitter to help keep it in place. When that dries, glue your earring posts to the back of your new studs, and that's it! How easy is that?
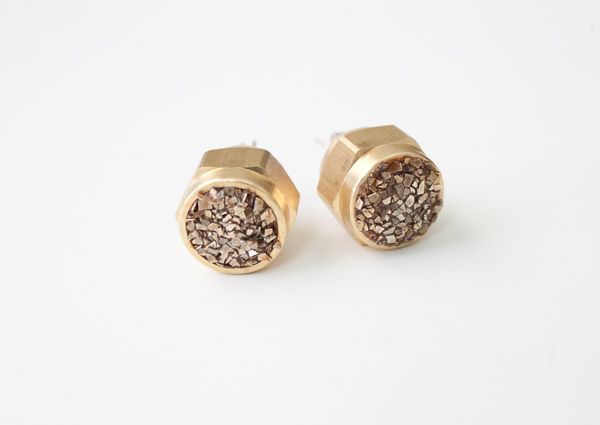
Thanks for reading lovelies, and if you liked this DIY, feel free to share it! And as always, if you decide to give this project a try, I'd love to see how it turned out... Happy Tuesday, everyone! xx
{WW} Sunglasses Anonymous
Wednesday, April 16, 2014
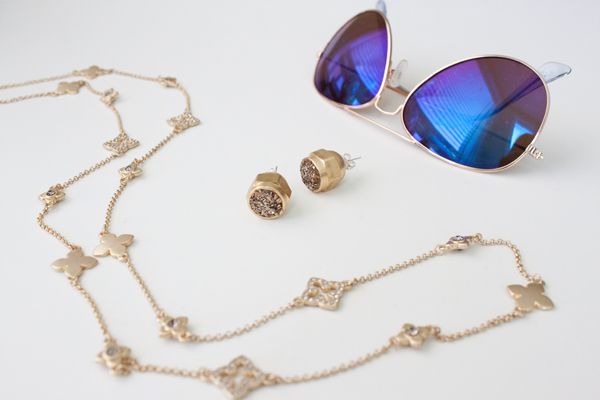
Hi, my name is Vickie and I'm an sunglassaholic. Oh, you're one too? Nice to meet you. Since we're being honest and all, I'm OK with my addiction — heck, I see no reason not to enable it each summer. This year's conquest? The aviator. I couldn't quite pull them off when I was banging (err, had bangs), but now that I'm all side-swept and all, it's gonna happen... Even if that means baby steps (aka shelling out $15 for Joe Fresh versus splurging on Ray Bans), I'm committed to the cause — who's with me!
From top: Ray Ban | Karen Walker | Super | The Row | Forever 21 | Valentino
MUST-HAVE: TWO-TONE SUNGLASSES
Monday, April 14, 2014


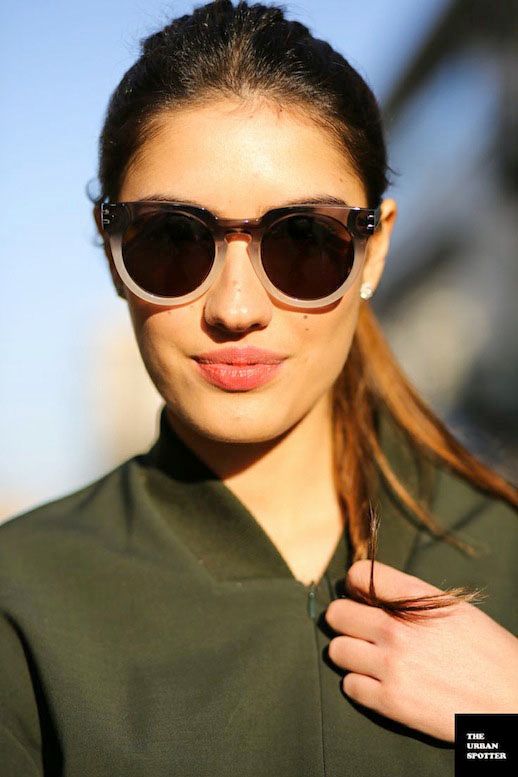
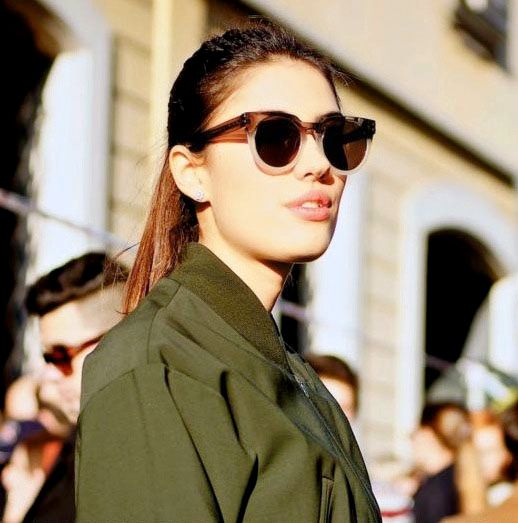
Photos via: The Urban Spotter | Fashionistable
After seeing these street-style shots of Patricia Manfield, I knew two-tone sunglasses were going to be a must-have for me this spring and summer.
My top picks:
5 THINGS: DIOR • PB 0110 • BLANC CANVAS • SOLACE LONDON • GUCCI
Friday, March 28, 2014


Photos via: Vogue Paris | PB 0110 | Visual Optimism | Style Bistro
5 things that caught my eye this week...
+ Dior 'Mise en Dior' Tribal Earrings: Must have these statement beauties.
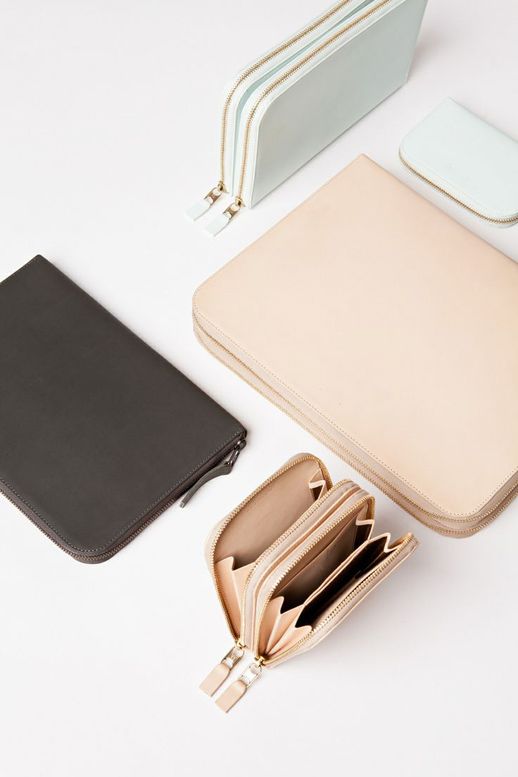
+ PB 0110 Accessories: Clean, minimal leather that's perfect for spring. (Also at Selfridges)
+ Blanc Canvas Editorial: This Marie Claire Australia spread is stunning!
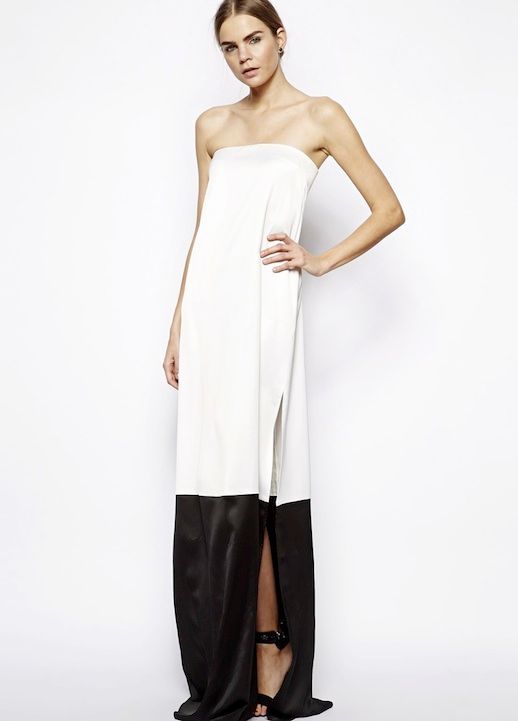
+ Solace London Foussard Bandeau Maxi Dress: Uh. Yes, please.
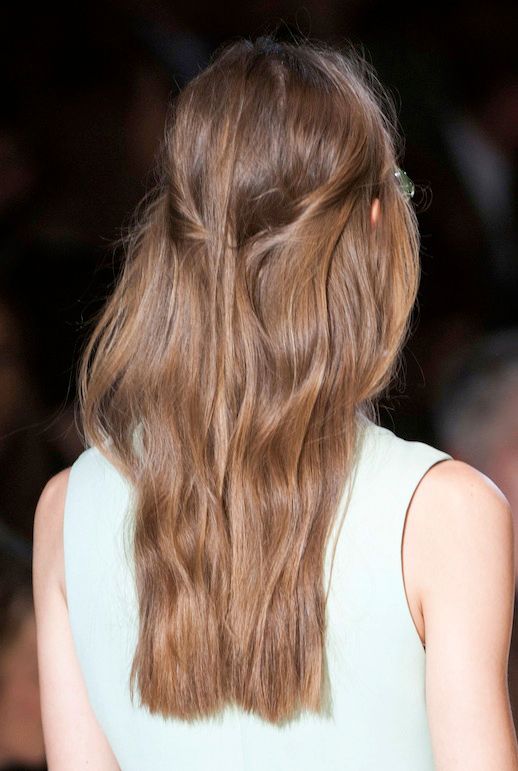
+ Gucci F/W 2014 Hair: Smitten with this romantic hairstyle. Total wedding hair vibes.
Happy Weekend!
x
{WW} The Perfect Match: Nails + Bags
Wednesday, March 19, 2014
You know how everyone used to be all about matching their shoes to their bags? Well thankfully that dressing convention is long gone, but wouldn't it be fun to match our nails to our bags instead? I think so! Here are some combo suggestions to get your style juices flowing:
Powder blue is like a breath of fresh air after months of oxblood this and mustard that, so why not embrace this airy hue on your arm and fingers alike? The 3.1 Phillip Lim Pashli is the best money I ever spent, but how amazing is it in this fun shade for spring?! Add a little lacquer by way of Deborah Lippmann's 'Blue Orchid' and your arms will be an Instagram photo waiting to happen.
Everyone loves a good pop of pink every now and then (or at least they should!), and this shade has me yearning for spring in a big way. From this gorgeous designer version to amazing Forever 21 or ASOS scores, there's a hue to match every taste and budget. The cherry on the cake? Pairing it with a perfectly pretty polish like this one from Bobbi Brown — Amazefest USA!
White out is white hot, especially where nails are concerned. Brush some of the light stuff on your digits (I love Essie's version) and grab a white clutch or tote — the only challenge you'll face here is keeping that leather clean... Challenge accepted, Milly bag.
Spring just isn't spring without a little mint action, and Essie's Mint Candy Apple has been one of my go-tos for the last couple years. Just imagine how darling it would look paired with this quilted bunny bag from ASOS! Forget what I said earlier — this one's the Instagram gold!
3.1 Phillip Lim medium Pashli | Deborah Lippmann 'Blue Orchid' polish | Alexander Wang Rocco Bag | Bobbie Brown 'Pink Cloud' polish | Milly Riley Tote | Essie 'Blanc' polish | ASOS Quilt Crossbody Bag | Essie 'Mint Candy Apple' polish
Powder blue is like a breath of fresh air after months of oxblood this and mustard that, so why not embrace this airy hue on your arm and fingers alike? The 3.1 Phillip Lim Pashli is the best money I ever spent, but how amazing is it in this fun shade for spring?! Add a little lacquer by way of Deborah Lippmann's 'Blue Orchid' and your arms will be an Instagram photo waiting to happen.
Everyone loves a good pop of pink every now and then (or at least they should!), and this shade has me yearning for spring in a big way. From this gorgeous designer version to amazing Forever 21 or ASOS scores, there's a hue to match every taste and budget. The cherry on the cake? Pairing it with a perfectly pretty polish like this one from Bobbi Brown — Amazefest USA!
White out is white hot, especially where nails are concerned. Brush some of the light stuff on your digits (I love Essie's version) and grab a white clutch or tote — the only challenge you'll face here is keeping that leather clean... Challenge accepted, Milly bag.
Spring just isn't spring without a little mint action, and Essie's Mint Candy Apple has been one of my go-tos for the last couple years. Just imagine how darling it would look paired with this quilted bunny bag from ASOS! Forget what I said earlier — this one's the Instagram gold!
3.1 Phillip Lim medium Pashli | Deborah Lippmann 'Blue Orchid' polish | Alexander Wang Rocco Bag | Bobbie Brown 'Pink Cloud' polish | Milly Riley Tote | Essie 'Blanc' polish | ASOS Quilt Crossbody Bag | Essie 'Mint Candy Apple' polish
Subscribe to:
Posts (Atom)